Checkbook.
Introduction
This page explains the Checkbook features of WebSBA. It is intended for
advanced users and assumes the reader is familiar with the basic
features of WebSBA.
Making a deposit.
To make a deposit (Select a bank account to debit,
select another bank account, cash on hand or paid in capital account to
credit.)
- From the Main Menu, click Checkbook under the Company
heading.
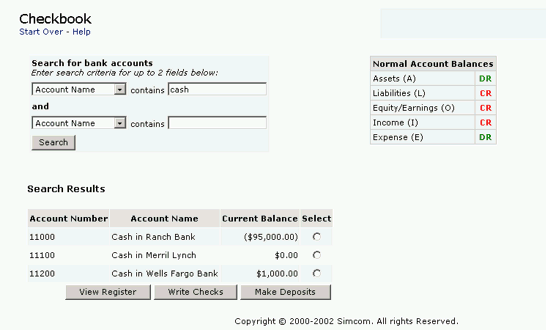
- Click Search to display a listing of all bank accounts. Three
accounts returned in the search results of the example bellow along with
the "Normal Account Balance" summary..
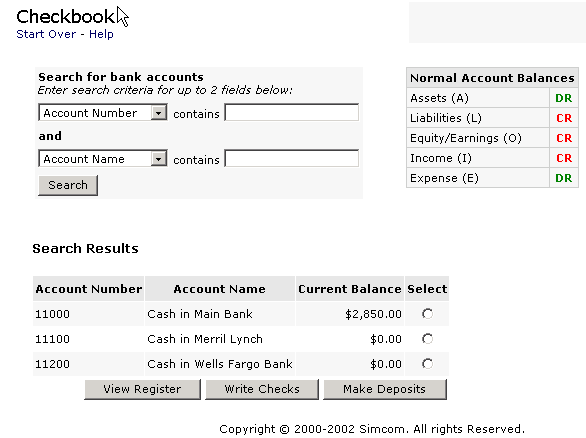
- Select a bank account (click on the corresponding radio button) and click Make Deposits.
The balance of the selected account will be debited by the amount of
the deposit. The returned screen requests that you select an account to
credit by the same amount. .
- Click Search to display all GL accounts. The balance of
that asset account will be 'Increased Debited" by the amount of
the deposit. We need an account to "Credit" by the same
amount. In the example bellow after a total search the account
"3200 Pd in Capital- Excess par" was selected. In case of
deposit of funds received from sales, the "cash on hand account
would be selected.
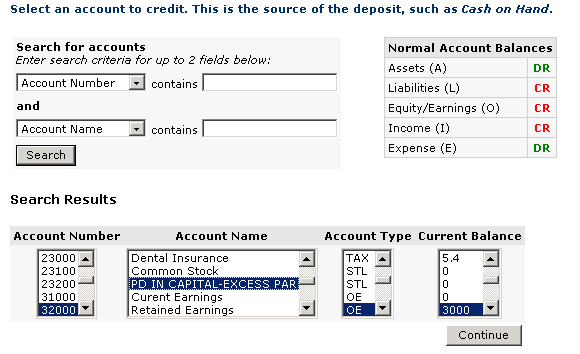
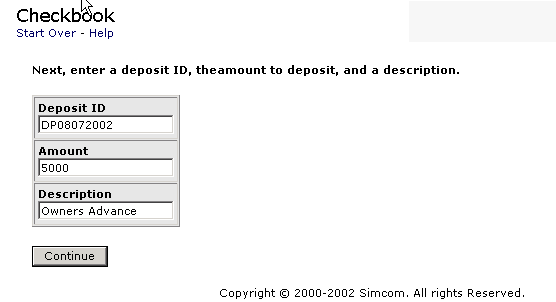
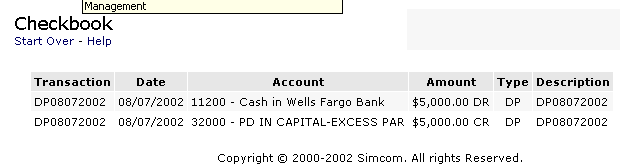
- Select an account to credit. In the example here account #
3200. Click the "Continue" button to get the following
three field input screen. The deposit ID is automatically generated
by the system. Enter the amount and description and click
"Continue" .
 This
The next screen requires confirmation. You have one chance to cancel
the transaction. If all is OK Click Continue.
This
The next screen requires confirmation. You have one chance to cancel
the transaction. If all is OK Click Continue.
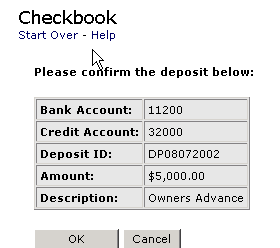
- The confirmation screen will follow. Click OK. The
transaction is completed and the summary is displayed.
Writing a Check,
(Select a bank account to credit select an expense account to
debit)
- From the Main Menu, click Checkbook under the Company
heading.
- Click Search to display a listing of all bank accounts. (In the
example above only the "cash" accounts would have returned).
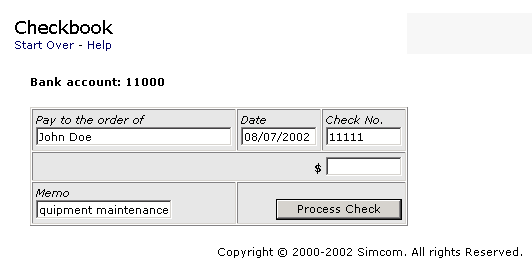
- Select a bank account (click on the corresponding radio button) and click Write
Checks. The selected bank account is indicated on the top of the
"pay to the order of" form. Enter the payee
name, check number and amount. No checks are processed
without values in these fields as in the example bellow.
The amount of $50 was entered in the "$" field..
- Enter the check information and click Process Check.
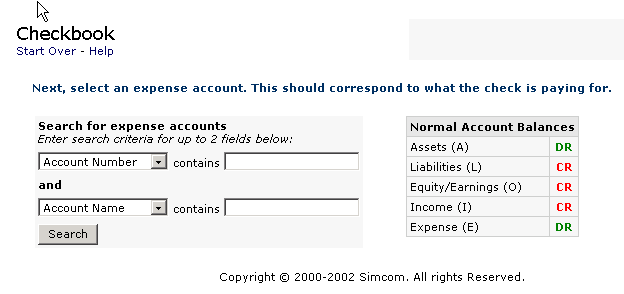
- Click Search to display all GL accounts.
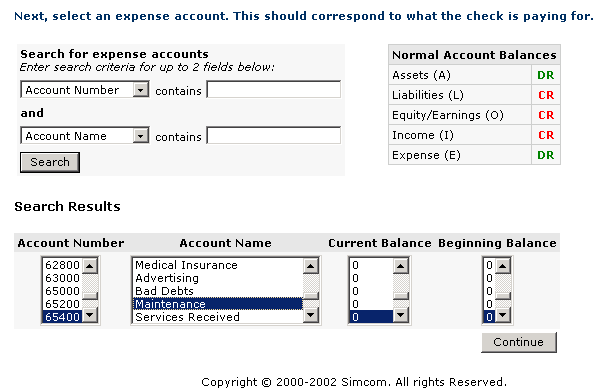
- Select an expense account. This should correspond to what the check is
paying for. In this example Maintenance expense. Click on the
"Continue" button. The following screen
will appear.
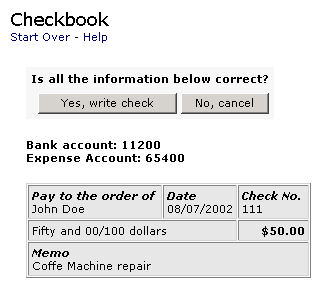
- Review the check information and click Yes, write check.
Click OK on the message and print the check. The
upper part includes payee and dollar amount and
the lower part information relative to the
payment. The check output can be
Viewing an Account Register
- From the Main Menu, click Checkbook under the Company
heading.
- Click Search to display a listing of all bank accounts.
- Select a bank account and click View Register.
- Click Search to display the entire register. You may optionally
include search criteria to limit the entries to return.
Summary
Return to the Table of Contents.